![How to Use SyncNames with Sedo [Guide]](https://domainsoftwares.com/wp-content/uploads/2020/07/SyncNames-for-Domain-Professional-Seller.png "How to Use SyncNames with Sedo [Guide]")
How to Use SyncNames with Sedo [Guide]
In this guide, I will show you how to convert an Afternic csv file into Sedo csv file.
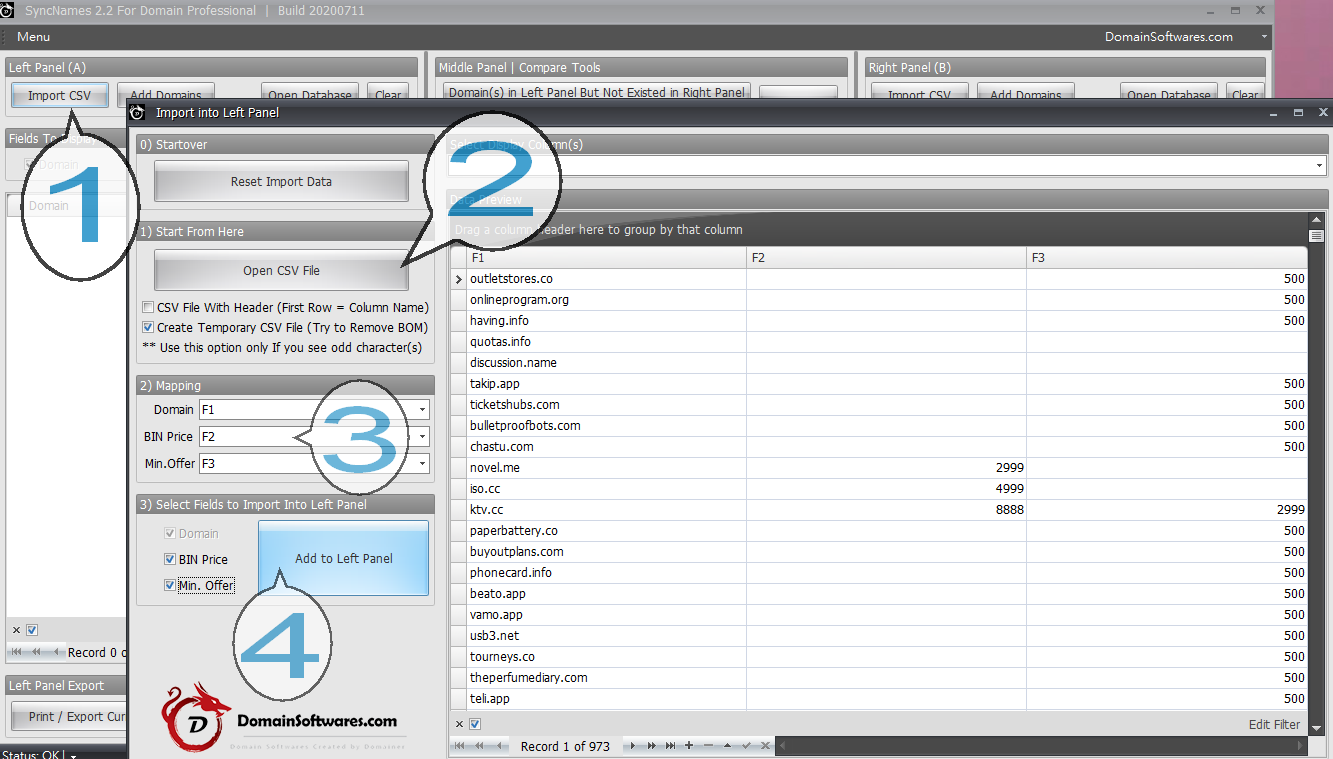
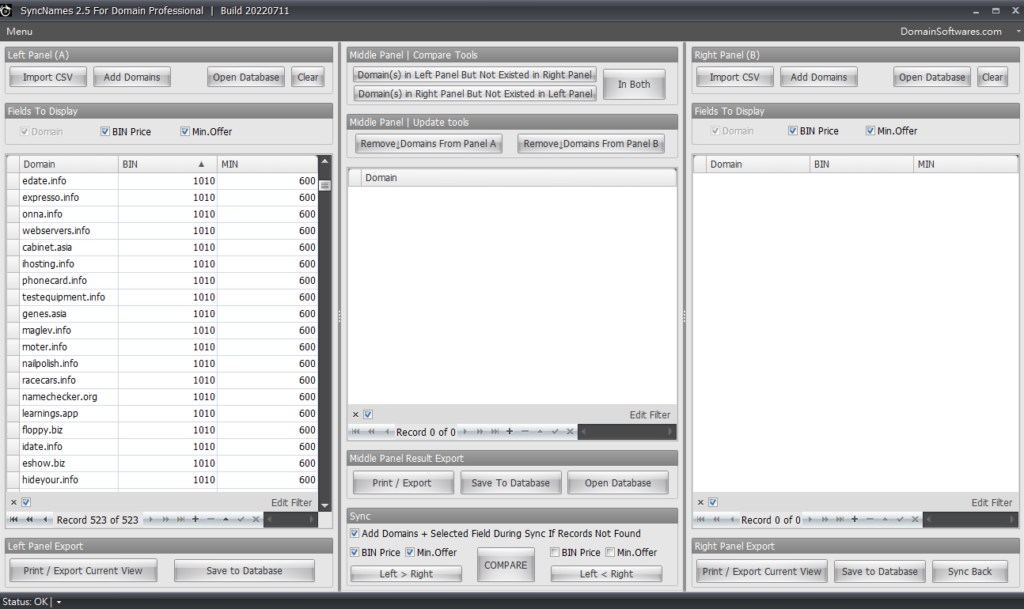
At first, we have to import the Afternic csv file into left panel.
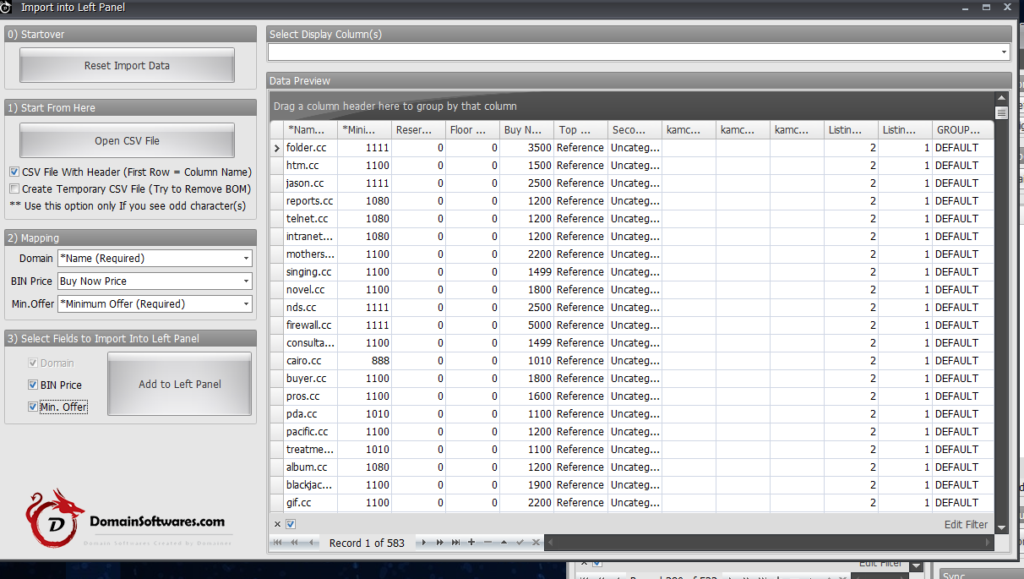
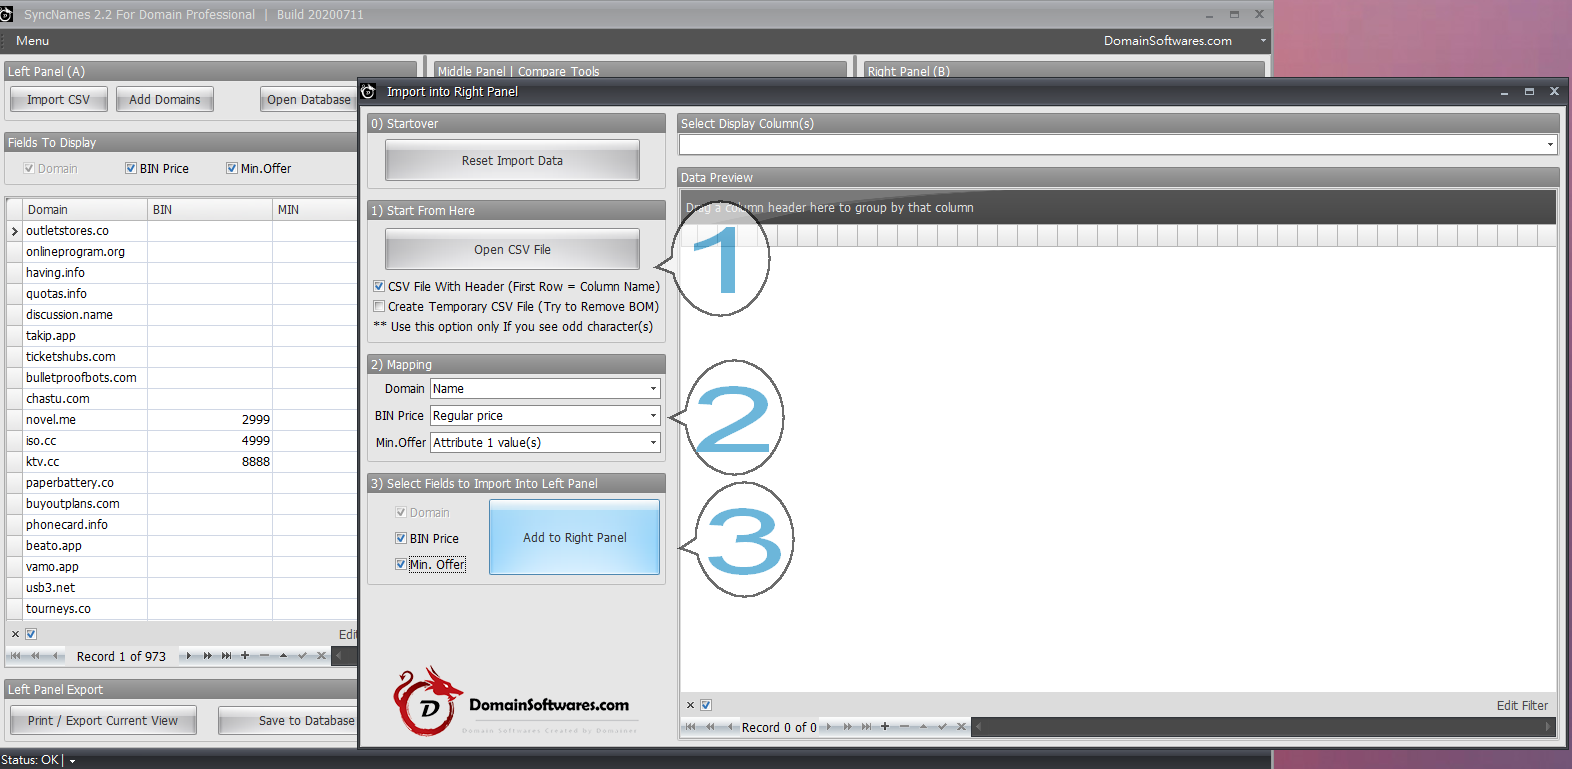
After that we need to import the blank Sedo CSV file into the right panel.
The example file can be download from sedo but in order to use it you have to convert the Sedo xls file to csv first.
You can also choose to download the Sedo blank csv file from our server.
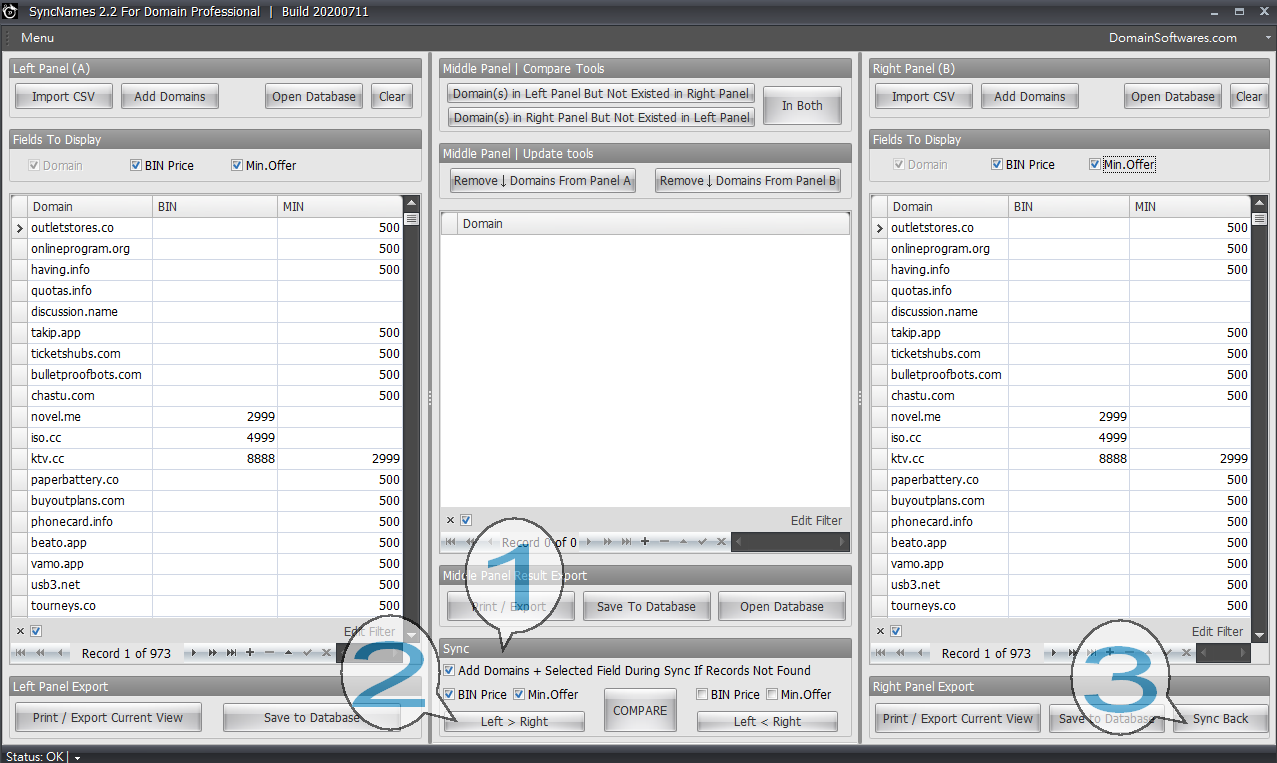
After both panels have the csv files imported. We have to sync the left panel data into right panel,
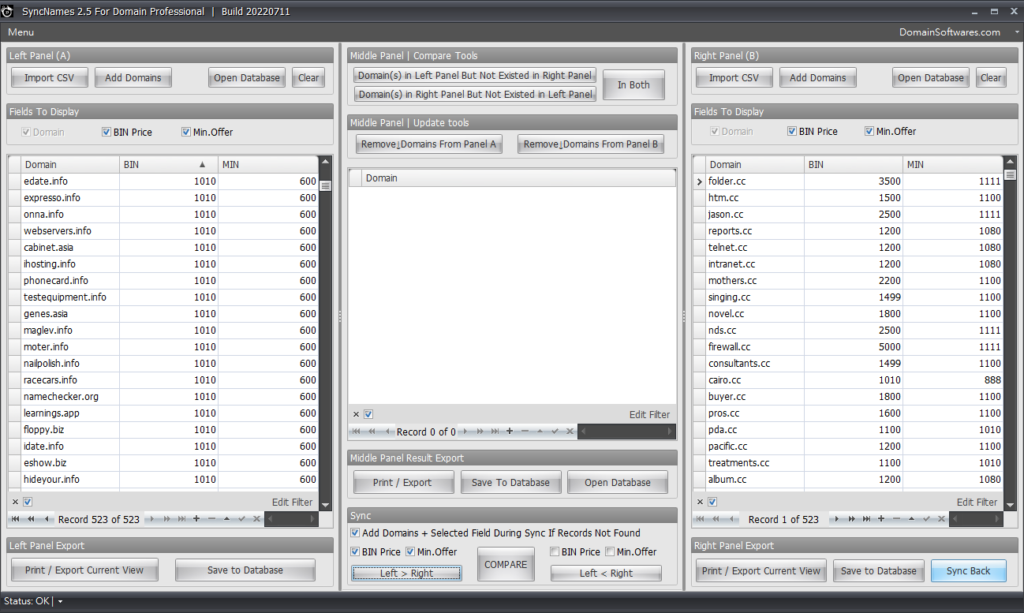
Click the box at the middle bottom as shown in the screenshot and then click the left > right button.
After you press the Left > Right button, the data would appeared on the right panel and it’s time to click the Sync Back button.
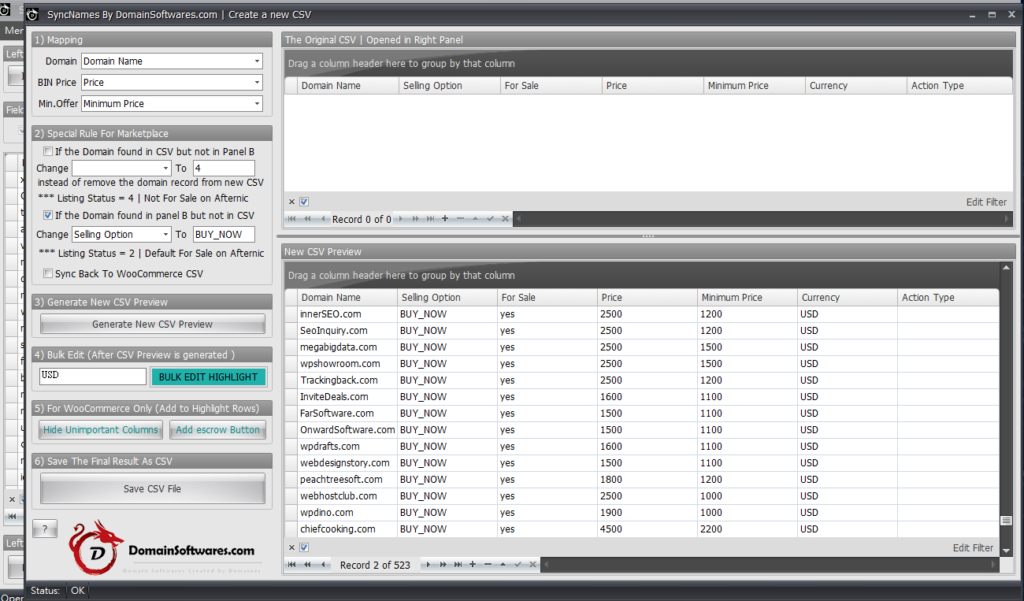
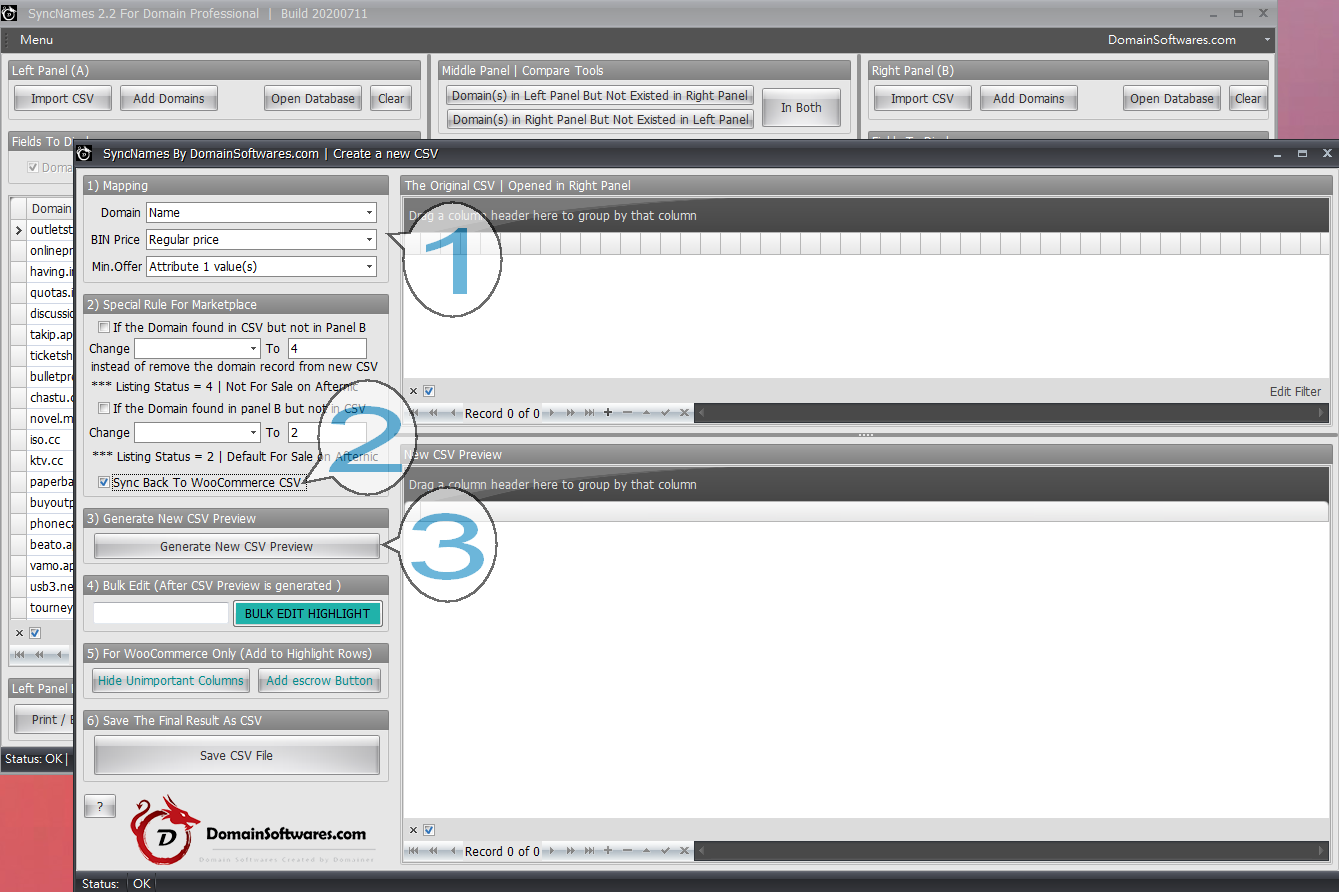
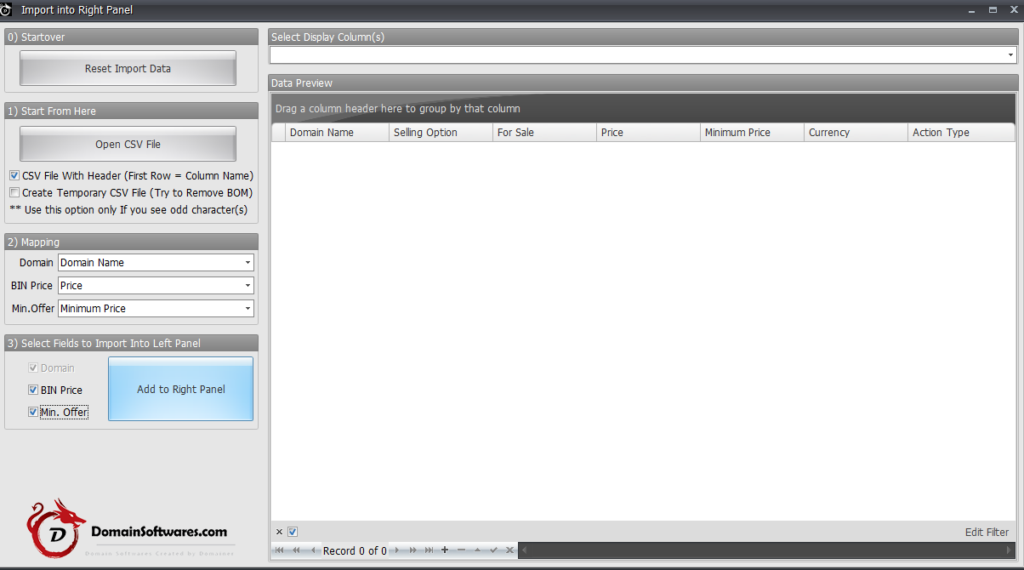
When the Sync back button is clicked a new popup windows would appeared.
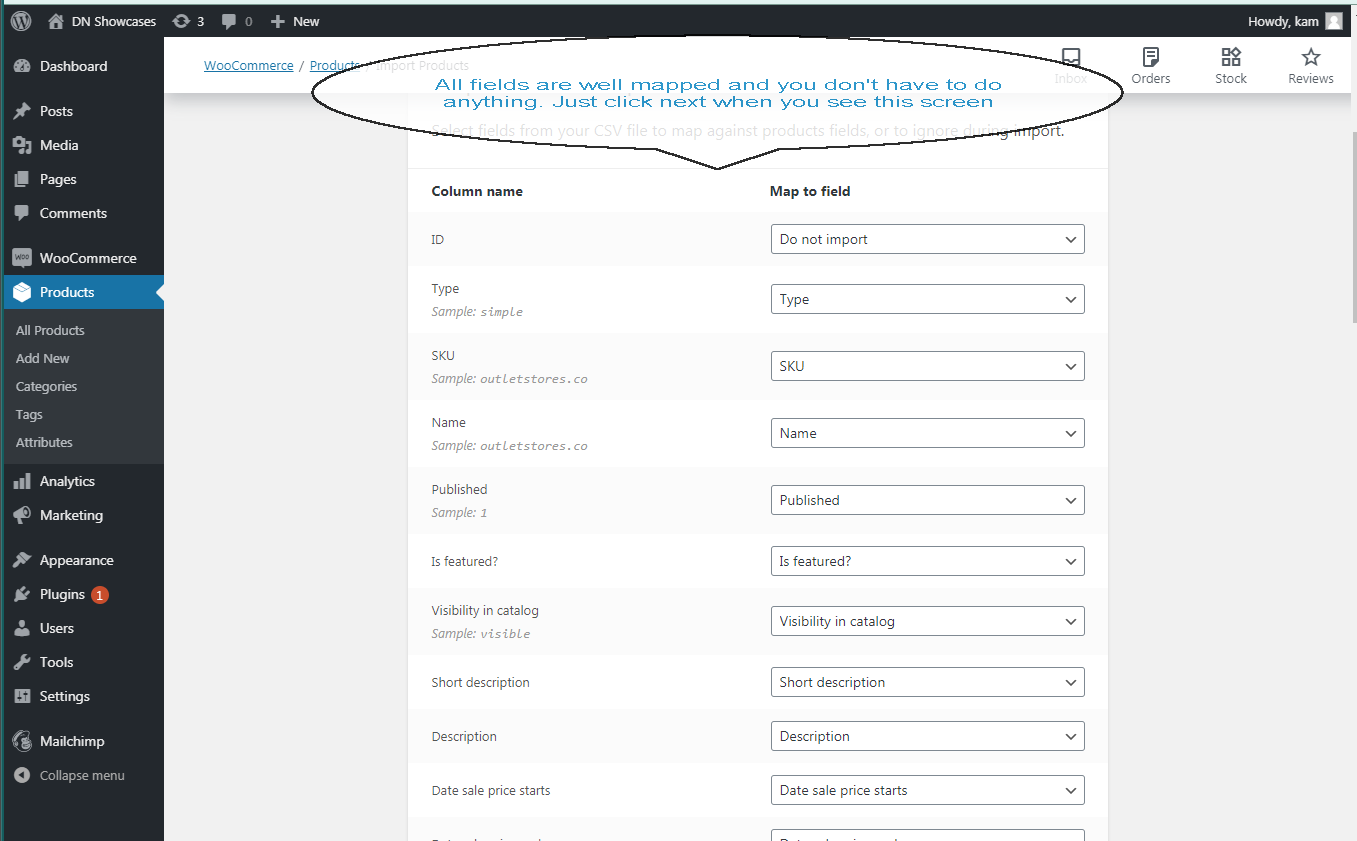
At first, we have to finish the field mapping,
then we have to set the selling option to either BUY_NOW or MAKE_OFFER
After that, we have to add the field value for Currency and For Sale since they’re both missing by default.
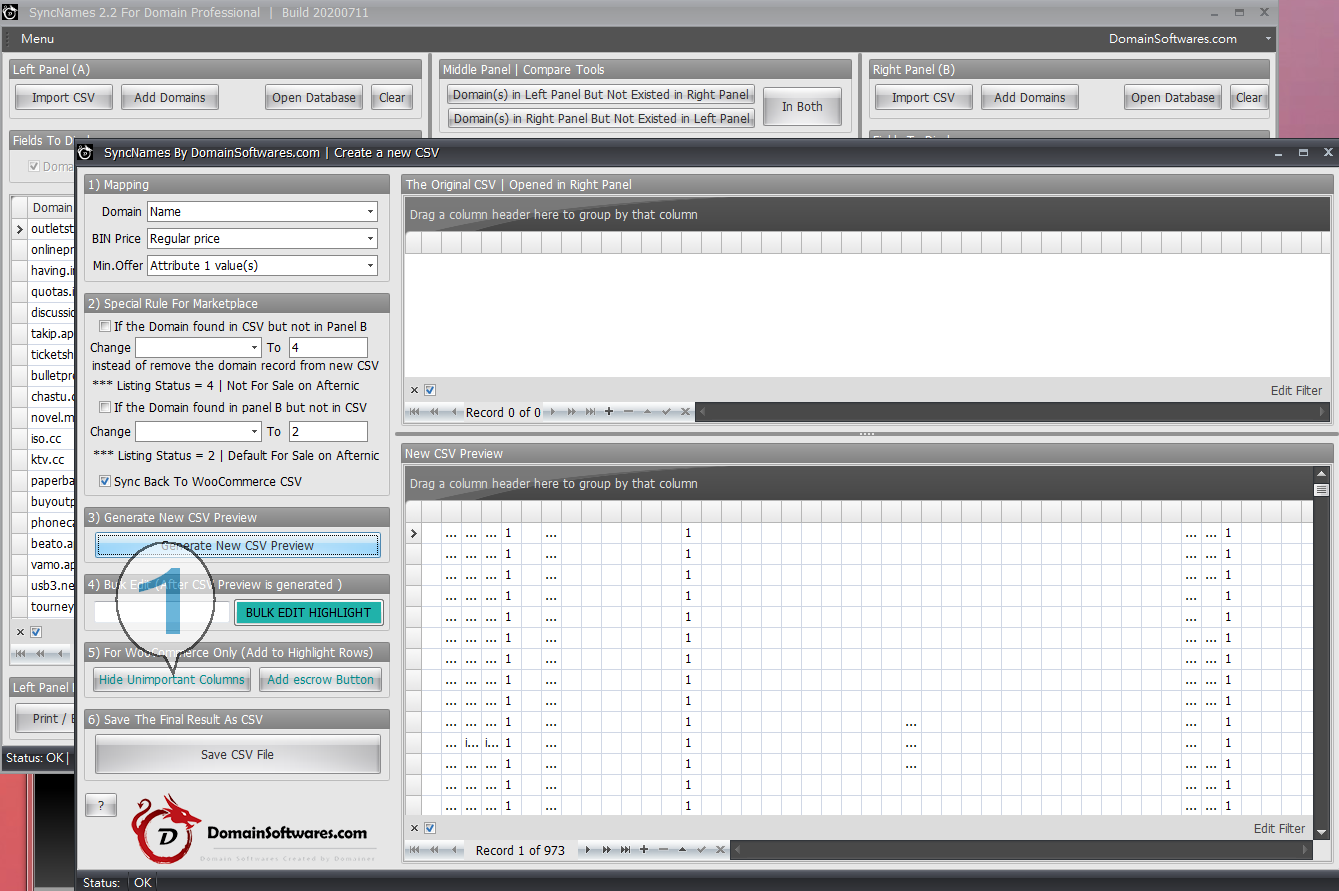
Use the bulk edit Highlight function to add the missing value for those fields.
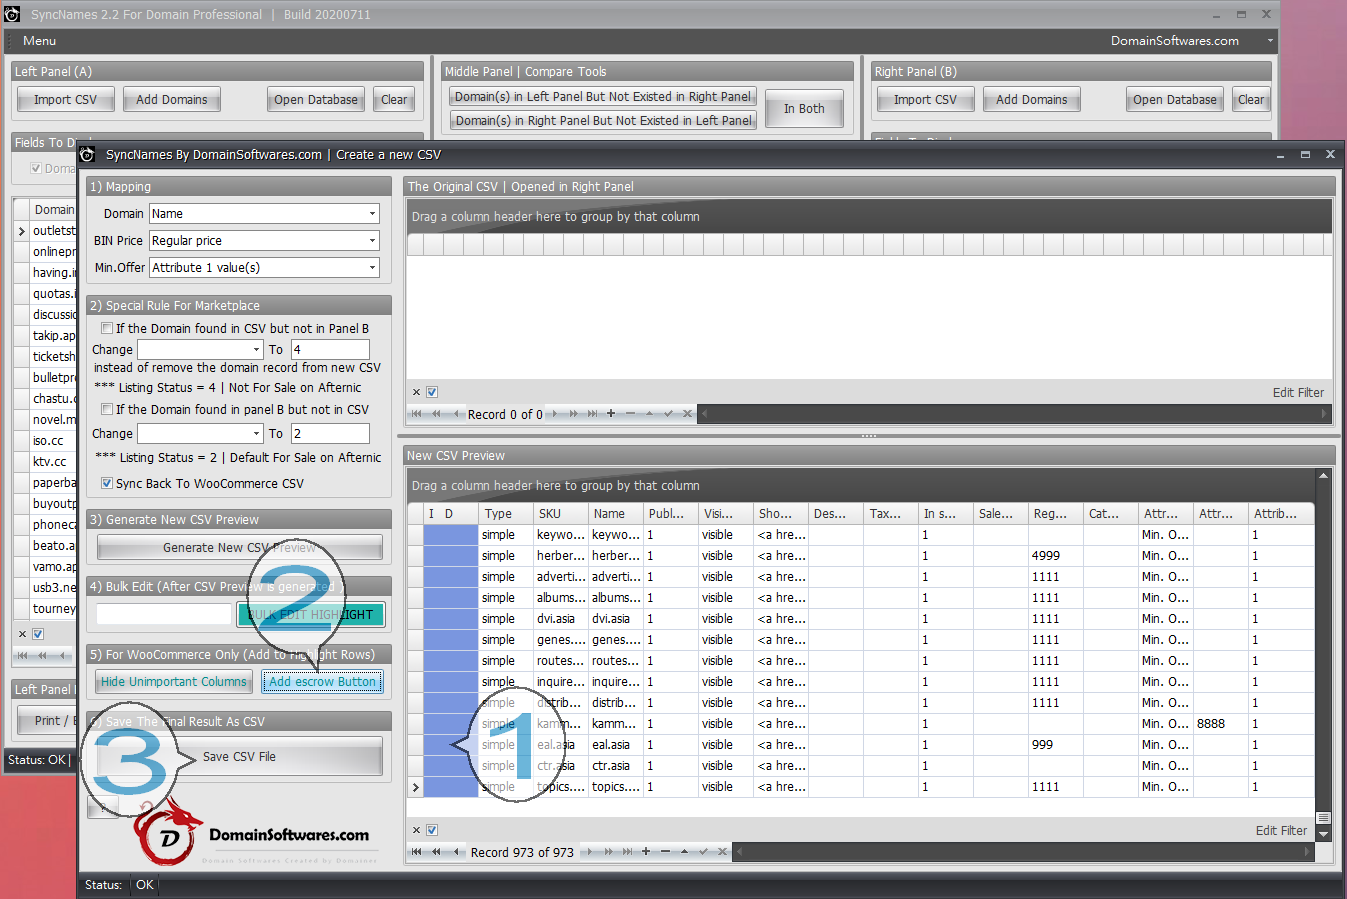
After all the missing value are set, click the save csv file button.
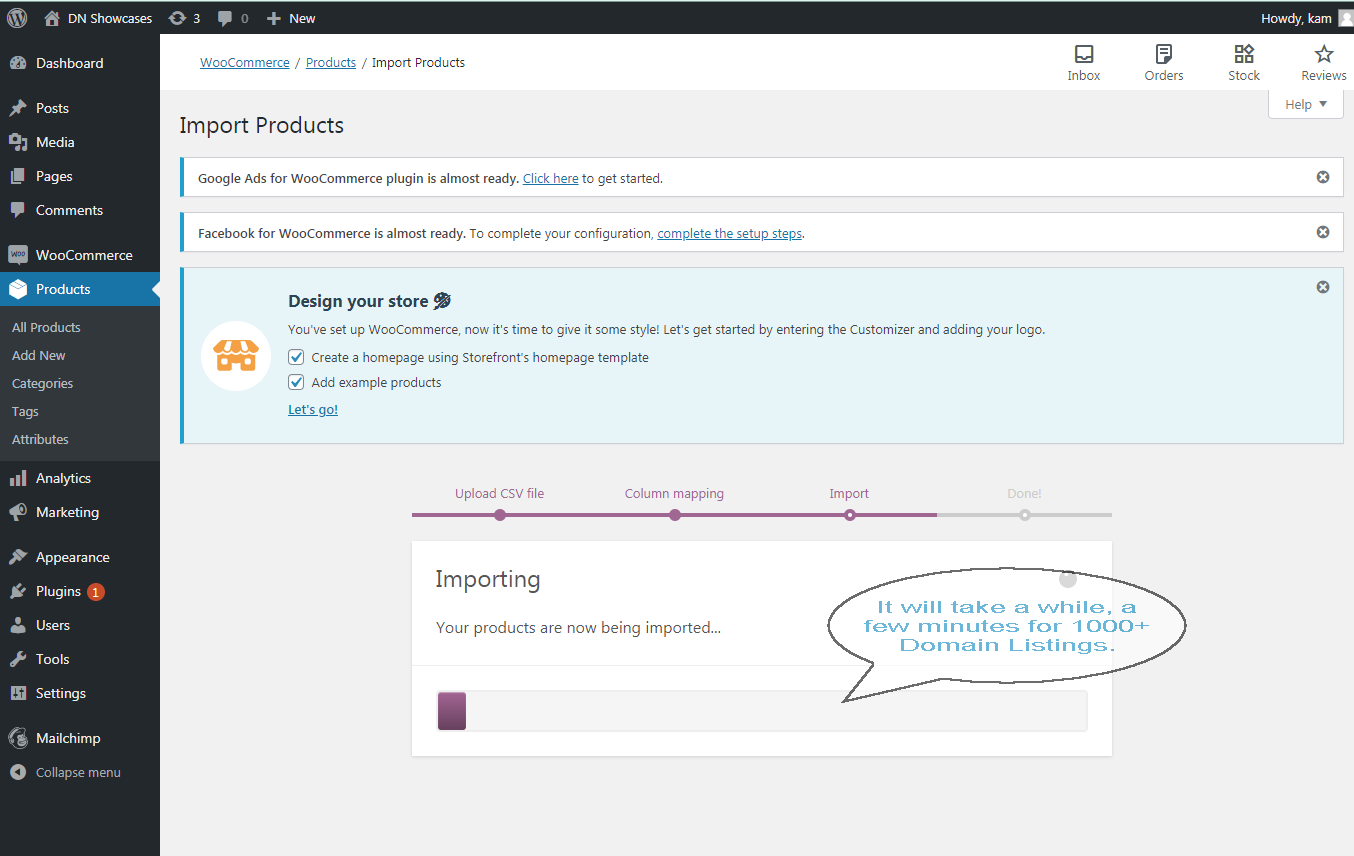
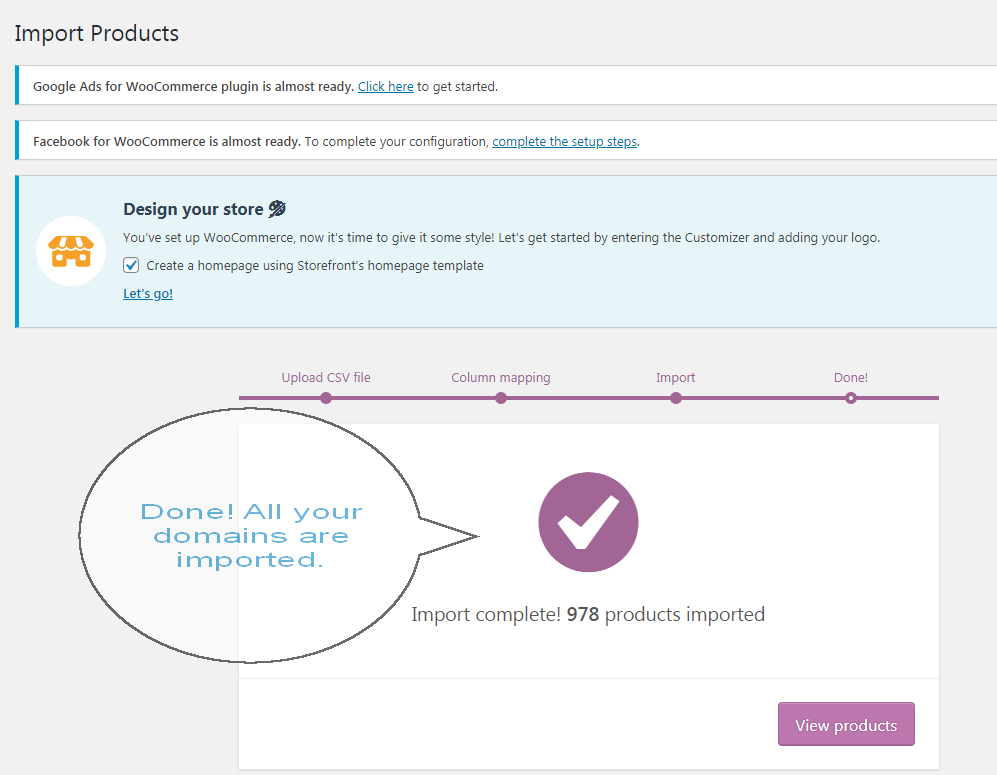
Upload the saved csv file to Sedo and Sedo would add / update your domain listing accordingly.